- This program is available for informational and advertising purposes only. By downloading it you accept the obligation to remove it after reviewing or acquire it legally. The program or its part cannot be used for commercial purposes.
- Release Year: 2009
- Language: English
- Platform: Windows 2000; Windows XP; Windows Vista; Windows 7, Windows 8, Windows 10 with VirtualBox
- Owner: Maritime Education Sweden AB
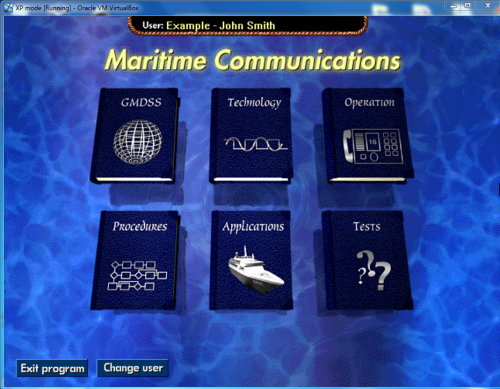
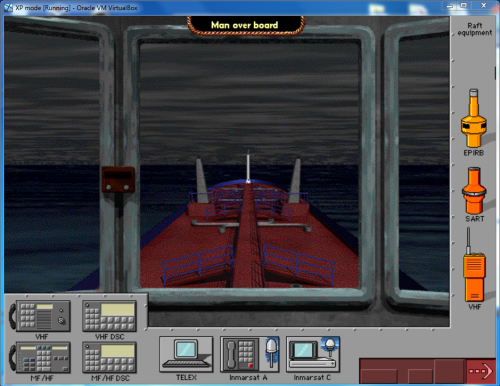
The Maritime Communications program is delivered on a compact disc and has the abbreviated name of “MARCOM”. This program, in addition to providing information on all sections of the GMDSS, has great visualization capabilities with demonstration of emergency scenarios and playback of conversations made in the situations in question in English. In the same language, continuous soundtrack is conducted when studying theoretical issues, equipment, procedural issues of communication in the GMDSS system. When studying the main phrases that make up the radio, it is possible to practice the correct pronunciation in the presence of a microphone. In addition, the MARCOM program has a section that allows you to check the quality of assimilation of the material studied (exam in all sections of the GMDSS).
The minimum requirements for computers on which you can install this program are outlined in the Readme.txt file. In order to play Maritime Communications-GMDSS CD-ROMs, it is necessary to have a computer with a processor of at least 486 or a Pentium with a clock frequency of at least 66 MHz, with at least 8 Mb random-access memory (RAM), a reader -niya of compact disks from two-speed and higher (CD-ROM drive, 2x speed or faster), it is enough to have an 8-bit sound card (8-bit sound board, Soundblaster compatible), external speakers (speakers), color monitor with a minimum resolution of 640,480 elements and a palette of 256 colors (Color monitor, minimum 640 x 480 pixels, 256 colors).
You can read more here in Russian about this program.
HOW TO INSTALL
When installing the program on the hard disk of the computer, only the launch and control files are installed, all the rest of the information is reproduced directly from the CD. For this reason, at least 3 MB of free space is required on the hard disk of the computer. Before installing this program, Windows 3.1 or 3.11 or Windows 95 or Windows 98 must be installed on the computer. Since the program was originally developed for Macintosh computers, you must install QuickTime for Windows (QTW) to play it on IBM PC).
1. We will use Oracle VM VirtualBox to run it on Windows 7, Windows 8 or Windows 10. The resulting virtual machine will run XP non-activated, without a license key, and you can use it for 30 days before it locks down. After the 30 days run out, you can re-create the virtual machine once again and use it for another 30 days, and so on. This is definitely not convenient for continuous use but will due just fine for testing old software or malware, for example. Alternatively, if you have an old XP license lying around, you can use it to register this installation.
XP Mode was introduced for Windows 7 (Professional, Enterprise, or Ultimate) users as a way to run software designed for XP in Windows 7. For Windows 7 users, installing the XP Mode is easy: download WindowsXPMode_en-us.exe, run the installer, done. Since Wiindows 8 or 10 does not support XP Mode, we’ll need to extract the virtual hard drive included in XP Mode and run it as a virtual machine.
Go to 7-zip.org web page, download and install the 7 Zip program in your PC. It’s important to install the 32-bit (also called x86) version of 7-zip for a 32-bit operating system and the 64-bit (also called x64) version for a 64-bit OS, since the x64 version won’t work on x86 and the x86 version won’t run with context menu on x64 machines. If you are not sure if you have a x86 or x64 operating system installed, you can find this out in several ways. Here are 2: a) Press Win+X (this opens the Power User Menu) and select System. Look under System -> System type for the OS type you have installed or b) Click Start (or press the Win key) and type PC Info. Look under System type and find out the type of OS you’re running. Now that you know what type of OS you have installed, download and install the corresponding version of 7-zip.
2. Go to virtualbox.org website and click on Windows hosts. You will download the file VirtualBox-6.0.14-133895-Win.exe

3. Double click on downloaded VirtualBox-6.0.14-133895-Win.exe file to install the Virtual Box.

4. Click on Next button 3 times, click on Yes button and Install button.

5. Click on Finish button when installation done. The Oracle VM VirtualBox Manager will open.

6. Download the XP Mode from Microsoft. XP Mode is available for download directly from Microsoft here. Click on the red Download button on that page will give you the choice in the image below. The difference between WindowsXPMode_en-us.exe and WindowsXPMode_N_en-us.exe is that the version with N in it does not contain Windows Media Player. Choose the WindowsXPMode_en-us.exe, click on Next button and continue with the download.

7. Right-click with mouse the WindowsXPMode_en-us.exe file downloaded before and select 7-zip -> Extract Here or Extract to “WindowsXPMode_en-us” (or the filename you downloaded)

8. After extraction browse to Sources folder and notice the xpm file. Right-click with mouse on xpm and choose 7-zip -> Open archive. If you don’t see the Sources folder at this time, go back one step and from the same 7-zip right-click context menu, choose open archive as CAB, instead of extracting to “WindowsXPMode_en-us”, then pick up from there.

9. Notice the VirtualXPVHD file.

10. Extract it to a location of your choice. Rename it to VirtualXPVHD.vhd.
11. You can go ahead and delete the WindowsXPMode_en-us.exe file downloaded and all the other files extracted from it, except for VirtualXPVHD.vhd.
12. Click New to create a new virtual machine in Oracle VM VirtualBox Manager.

13. Enter the name of your virtual machine, and make sure the operating system selected is Windows XP (32 bit). Click on Next button.

14. Choose how much memory you want to allow the virtual machine to use. VirtualBox’ default is 192 MB ram, but for better performance you can select 256 or 512MB. Click on Next button.

15. Select Use an existing virtual hard disk drive and click on browse icon.

16. Click on Add icon.

17. Select VirtualXPVHD.vhd file. Click on Open button.

18. Click on Choose button.

19. Click on Create button.

20. Congrats!!! You have created the virtual machine.

21. Click on Settings icon.

22. We need to set up the storage device. Go to Storage, select Empty and tick on Live CD/DVD.

23. Go to USB. We need to add new USB filter. Click on icon pointed with arrow.

24. Select Logitech USB receiver. Click on OK button.


25. Click on Start icon.

26. The virtual machine is running now. You will need to set up the Windows XP now. It will take some time to complete (approx 1 hour). It can be that you will still see the black screen in 1 hour – in this case you need to Power off the virtual machine and start it again.

Click on X on Oracle VM VirtualBox window to get the pop-up window with options. Select Power off the virtual machine and click on OK button. The Virtual machine will be off. Click on Start icon.

27. You will see the Windows XP desktop.

28. Go to Devices -> Optical Drives and make sure that Host drive (G) selected.

29. Download Marcom.zip. Size is approx. 275 MB.
30. Unzip GMDSS.mdf and GMDSS.mds from Marcom.zip .
31. Unzip and install UltraISO program. Open UltraISO program, click on Continue to Try button if this program is not registered.
32. Click on Mount to Virtual Drive icon (shown with red arrow). Select the image file GMDSS.mdf and click on Mount button. If you want to unmount image file from virtual drive click on Unmount button.

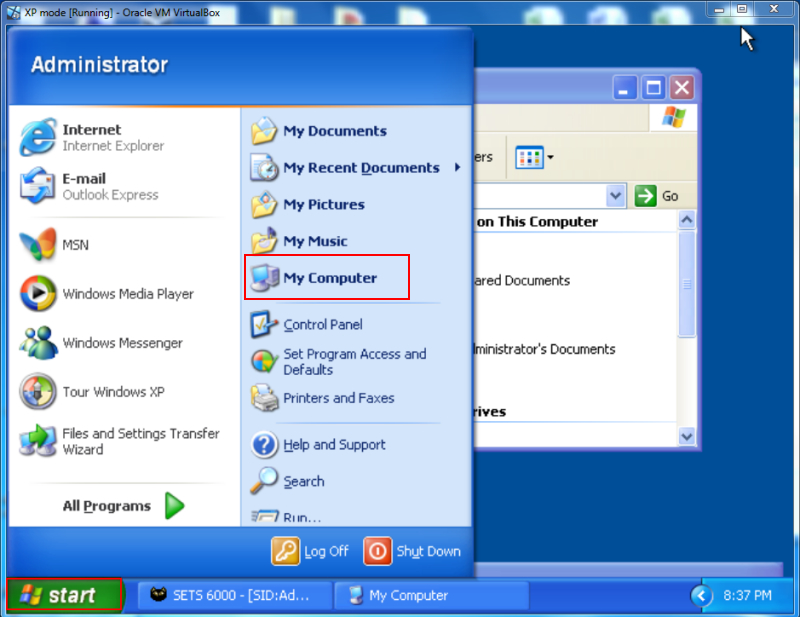
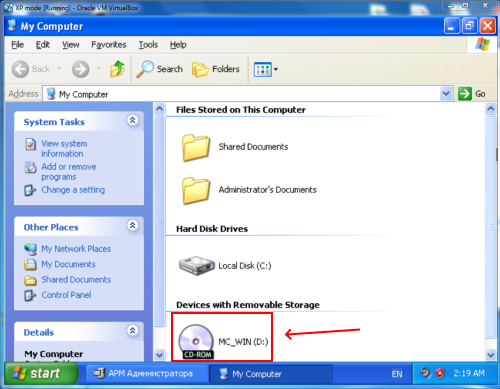
33. Go to Start-> My computer and select Device with removable storage (MC_WIN ())
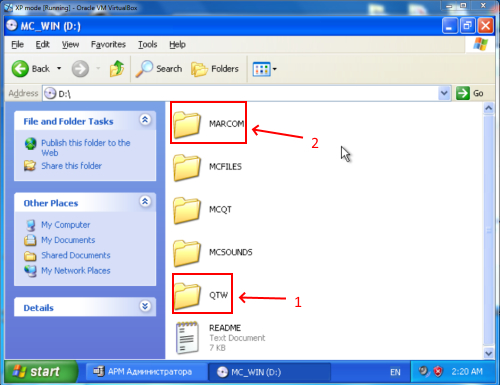
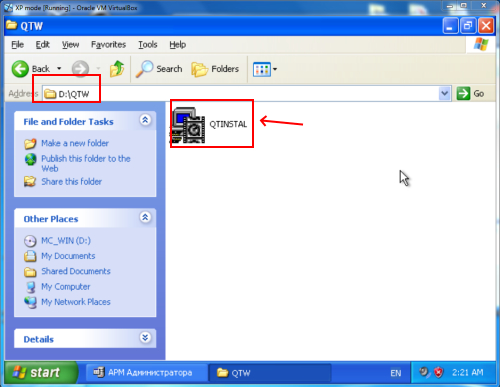
34. Go to QTW folder and double-click on qtinstall.exe . The install is very simple.
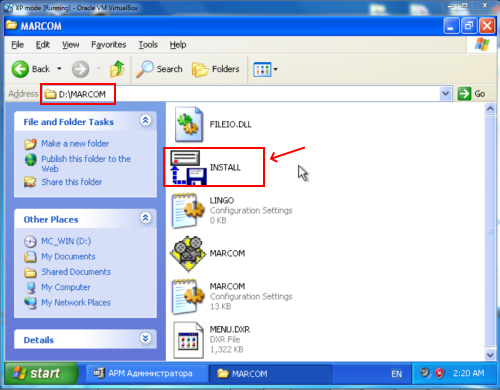
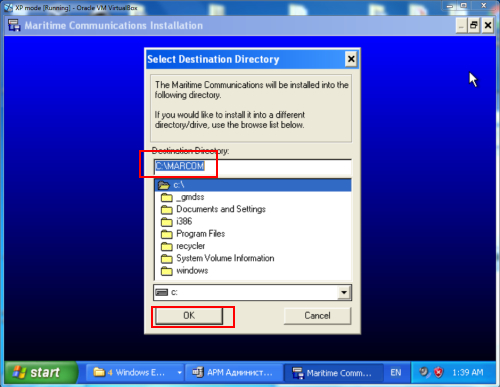
35. Go to MARCOM folder and double-click on Install.exe. Please note that when you try to run the program directly from the disk using the Marcom.exe file located in the MARCOM folder of the CD, you will receive a message about incorrect installation of the program.
36. After installation you will need to keep your image file GMDSS.mdf in Virtual CD drive in order to use the program.
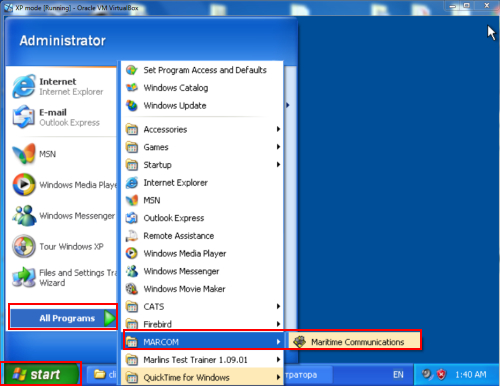
37. Go to Start->All programs->MARCOM->Maritime Communications to start the program.
38. That’s it. Congrats.