- This program is available for informational and advertising purposes only. By downloading it you accept the obligation to remove it after reviewing or acquire it legally. The program or its part cannot be used for commercial purposes.
- System requirements: Minimum hardware and software configuration: Pentium I processor; 16 Mb RAM; 10 Mb disk space;
- Operating environments: MS Windows 95/98, MS Windows NT 3.5 / 4.0. It’s 32 bit program. You can use it with MS Windows 7, MS Windows 8, MS Windows 10 together with VirtualBox and XPmode.
- Formalized reports require an established graphic MS Word 95, 97 editor.
- Interface language: English and Russian

Following the recommendations of the International Maritime Organization (IMO) and the Maritime Administration of Russia, the Russian company INFOMAR-TECH developed a multimedia software complex MSK CREW 2002, designed to test the knowledge and training of Russian sailors in the scope of the requirements of the STCW 78/95. Leading experts of the Moscow State Academy of Water Transport were involved in the develop-ment of the MSK CREW 2002.
CREW 2002 contains about 5000 questions on various maritime specialties (navigator, ship engineer, etc.), on 68 maritime disciplines. All questions are accompanied by illustrations.
CREW 2002 works in 2 modes: exam and testing. In the training mode, at the end of the answer, each question is prompted with the correct answer.
CREW 2002 allows you to create an individual test, for example, for a particular specialty, for testing by selecting the necessary groups of questions and number asked questions from these groups. Having formed the task, it can be saved for future use in a file (template). The next time there is no need to re-create the test for this specialty, just upload the appropriate file (template). During testing, the time spent on the answer is recorded. At the end of testing, a test report is generated in MSWORD formats.
APPLICATIONS
It can be used when testing seafarers to replace old-style diplomas with conventional ones, when hiring in shipping and crewing companies, when conducting exams in sea and river educational institutions and training centers, in computer classes and for self-training in ship conditions.
HOW TO INSTALL
1. Download crew2002.zip.
2. Go to 7-zip.org web page, download and install the 7 Zip program in your PC. It’s important to install the 32-bit (also called x86) version of 7-zip for a 32-bit operating system and the 64-bit (also called x64) version for a 64-bit OS, since the x64 version won’t work on x86 and the x86 version won’t run with context menu on x64 machines. If you are not sure if you have a x86 or x64 operating system installed, you can find this out in several ways. Here are 2: a) Press Win+X (this opens the Power User Menu) and select System. Look under System -> System type for the OS type you have installed or b) Click Start (or press the Win key) and type PC Info. Look under System type and find out the type of OS you’re running. Now that you know what type of OS you have installed, download and install the corresponding version of 7-zip.
3. Unzip crew2002.mdf and crew2002.mds from crew2002.zip.
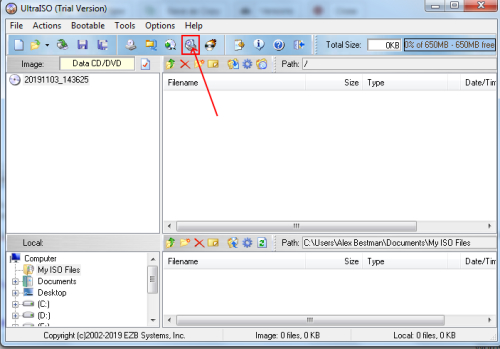
4. Unzip and install UltraISO program. Open UltraISO program, click on Continue to Try button if this program is not registered.
5. Click on Mount to Virtual Drive icon (shown with red arrow). Select the image file crew2002.mdf and click on Mount button. If you want to unmount image file from virtual drive click on Unmount button.
6. The easiest solution is to use Oracle VM VirtualBox to run XP mode on Windows 7, Windows 8 or Windows 10.
The resulting virtual machine will run XP non-activated, without a license key, and you can use it for 30 days before it locks down. After the 30 days run out, you can re-create the virtual machine once again and use it for another 30 days, and so on. This is definitely not convenient for continuous use but will due just fine for testing old software or malware, for example. Alternatively, if you have an old XP license lying around, you can use it to register this installation.
XP Mode was introduced for Windows 7 (Professional, Enterprise, or Ultimate) users as a way to run software designed for XP in Windows 7. For Windows 7 users, installing the XP Mode is easy: download WindowsXPMode_en-us.exe, run the installer, done. Since Wiindows 8 or 10 does not support XP Mode, we’ll need to extract the virtual hard drive included in XP Mode and run it as a virtual machine.
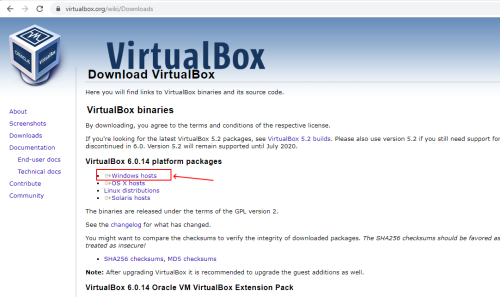
7. Go to virtualbox.org website and click on Windows hosts. You will download the file VirtualBox-6.0.14-133895-Win.exe
8. Double click on downloaded VirtualBox-6.0.14-133895-Win.exe file to install the Virtual Box.
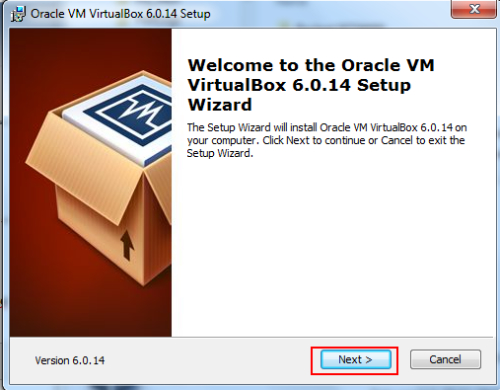
9. Click on Next button 3 times, click on Yes button and Install button.
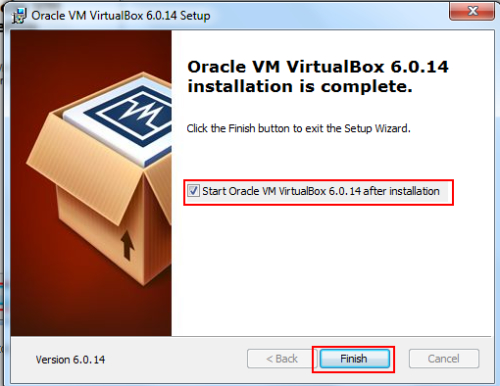
10. Click on Finish button when installation done. The Oracle VM VirtualBox Manager will open.
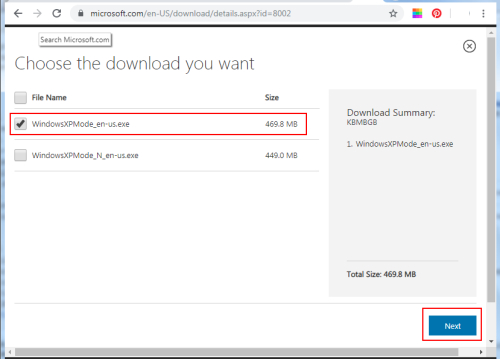
11. Download the XP Mode from Microsoft. XP Mode is available for download directly from Microsoft here. Click on the red Download button on that page will give you the choice in the image below. The difference between WindowsXPMode_en-us.exe and WindowsXPMode_N_en-us.exe is that the version with N in it does not contain Windows Media Player. Choose the WindowsXPMode_en-us.exe, click on Next button and continue with the download.
12. Go to 7-zip.org web page, download and install the 7 Zip program in your PC. It’s important to install the 32-bit (also called x86) version of 7-zip for a 32-bit operating system and the 64-bit (also called x64) version for a 64-bit OS, since the x64 version won’t work on x86 and the x86 version won’t run with context menu on x64 machines. If you are not sure if you have a x86 or x64 operating system installed, you can find this out in several ways. Here are 2: a) Press Win+X (this opens the Power User Menu) and select System. Look under System -> System type for the OS type you have installed or b) Click Start (or press the Win key) and type PC Info. Look under System type and find out the type of OS you’re running. Now that you know what type of OS you have installed, download and install the corresponding version of 7-zip.
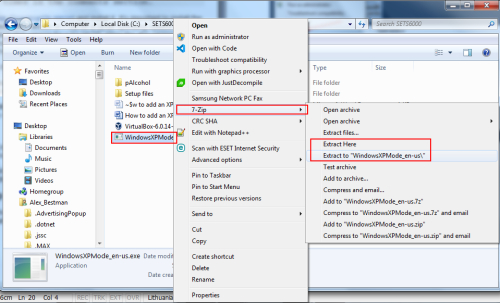
13. Right-click with mouse the WindowsXPMode_en-us.exe file downloaded before and select 7-zip -> Extract Here or Extract to “WindowsXPMode_en-us” (or the filename you downloaded)
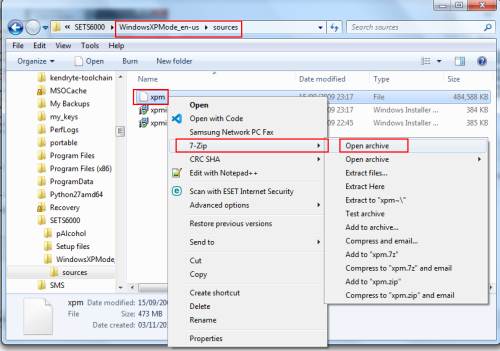
14. After extraction browse to Sources folder and notice the xpm file. Right-click with mouse on xpm and choose 7-zip -> Open archive. If you don’t see the Sources folder at this time, go back one step and from the same 7-zip right-click context menu, choose open archive as CAB, instead of extracting to “WindowsXPMode_en-us”, then pick up from there.
15. Notice the VirtualXPVHD file.
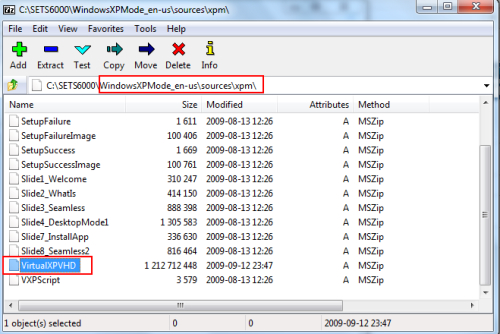
16. Extract it to a location of your choice. Rename it to VirtualXPVHD.vhd.
17. You can go ahead and delete the WindowsXPMode_en-us.exe file downloaded and all the other files extracted from it, except for VirtualXPVHD.vhd.
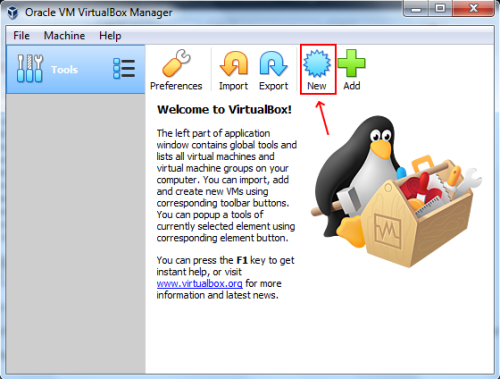
18. Click New to create a new virtual machine in Oracle VM VirtualBox Manager.
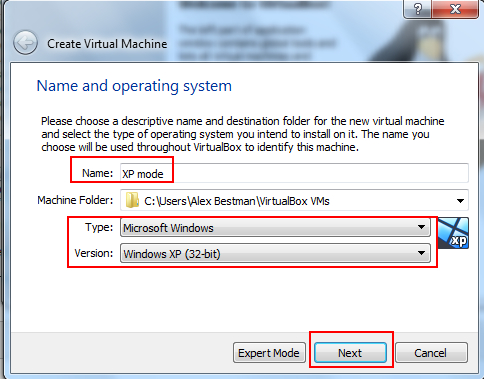
19. Enter the name of your virtual machine, and make sure the operating system selected is Windows XP (32 bit). Click on Next button.
20. Choose how much memory you want to allow the virtual machine to use. VirtualBox’ default is 192 MB ram, but for better performance you can select 256 or 512MB. Click on Next button.

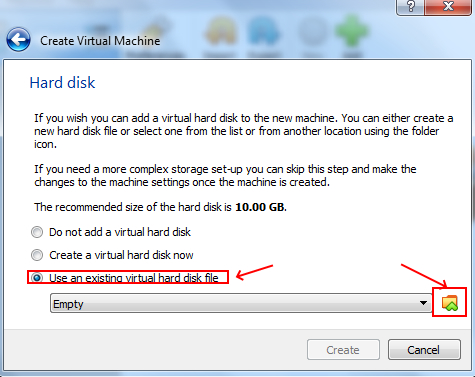
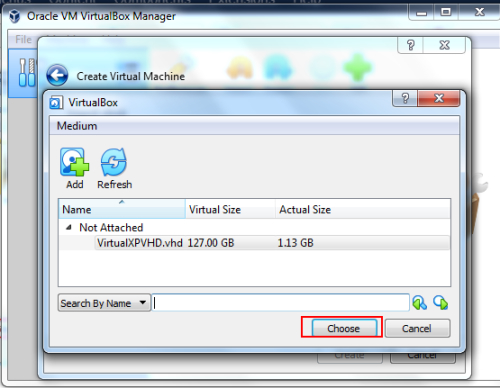
21. Select Use an existing virtual hard disk drive and click on browse icon.
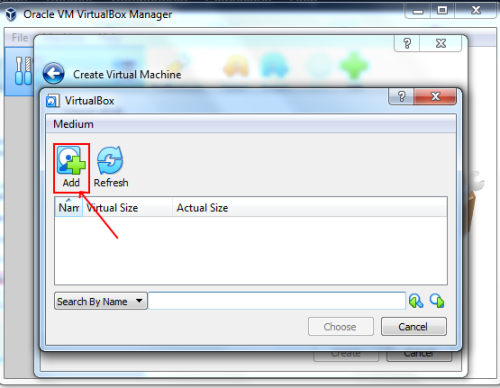
22. Click on Add icon.
23. Select VirtualXPVHD.vhd file. Click on Open button.
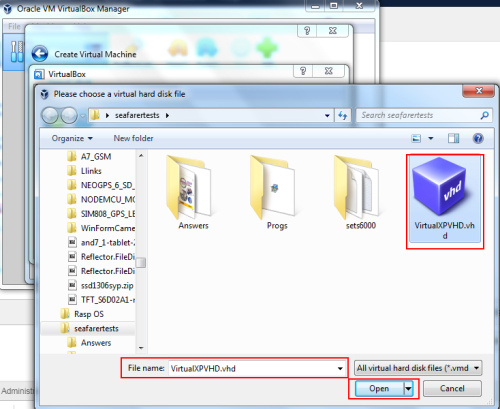
24. Click on Choose button.
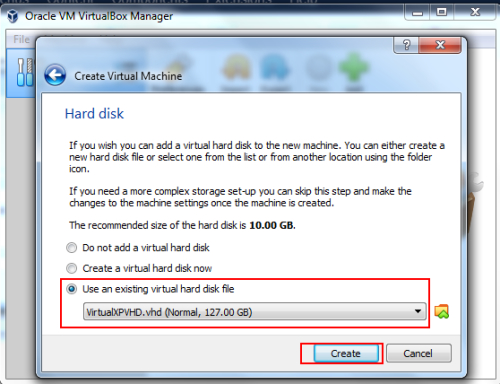
25. Click on Create button.
26. Congrats!!! You have created the virtual machine.

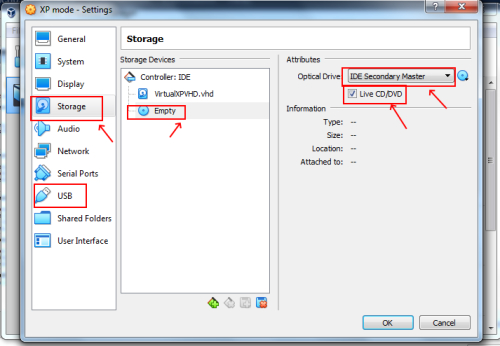
27. Click on Settings icon.

28. We need to set up the storage device. Go to Storage, select Empty and tick on Live CD/DVD.
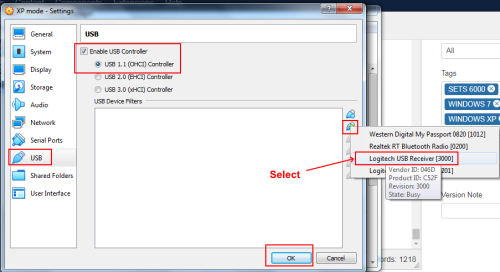
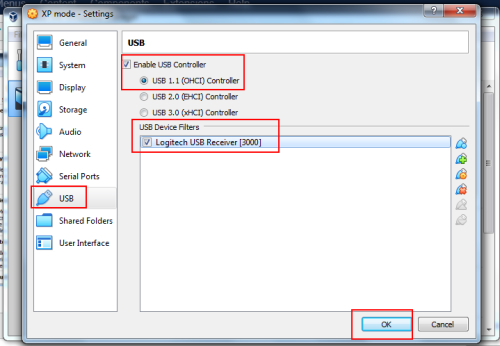
29. Go to USB. We need to add new USB filter. Click on icon pointed with arrow.
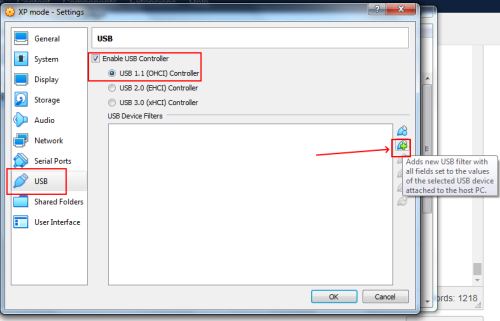
30. Select Logitech USB receiver. Click on OK button.
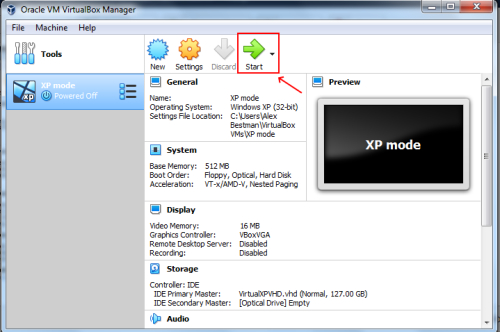
31. Click on Start icon.
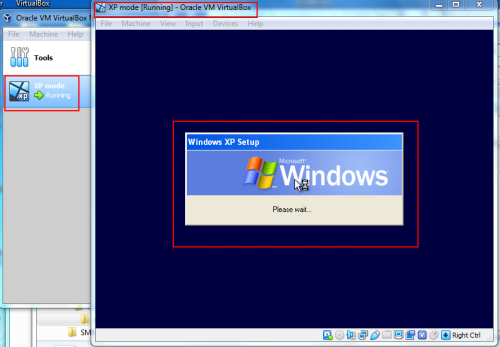
32. The virtual machine is running now. You will need to set up the Windows XP now. It will take some time to complete (approx 1 hour). It can be that you will still see the black screen in 1 hour – in this case you need to Power off the virtual machine and start it again.
Click on X on Oracle VM VirtualBox window to get the pop-up window with options. Select Power off the virtual machine and click on OK button. The Virtual machine will be off. Click on Start icon.


33. You will see the Windows XP desktop.

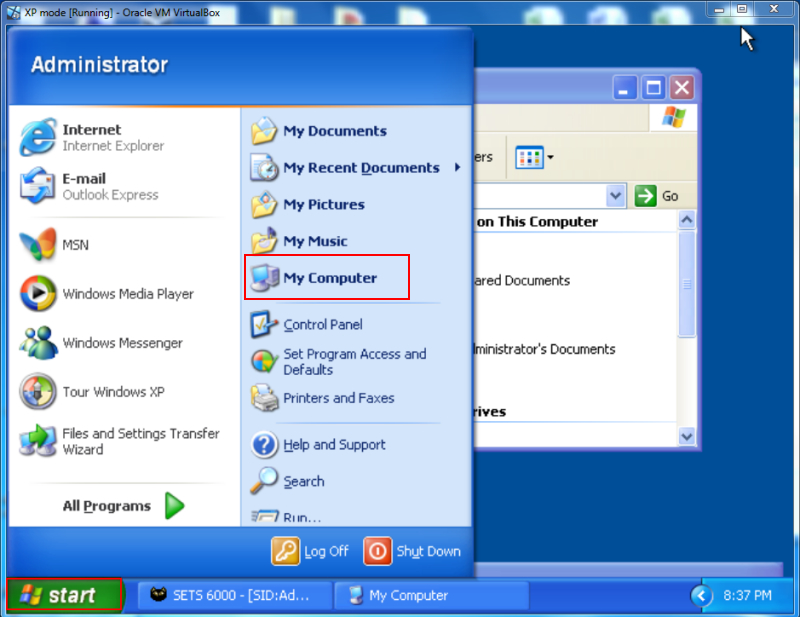
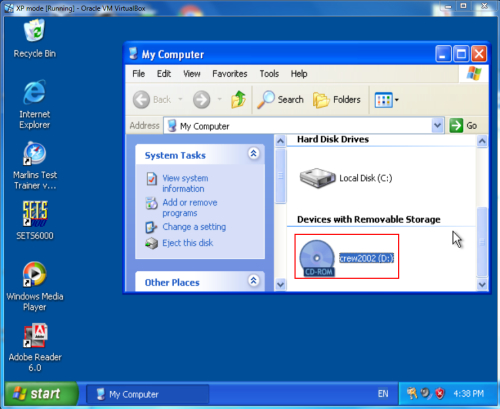
34. Go to Start-> My computer and select Device with removable storage (crew2002 ())
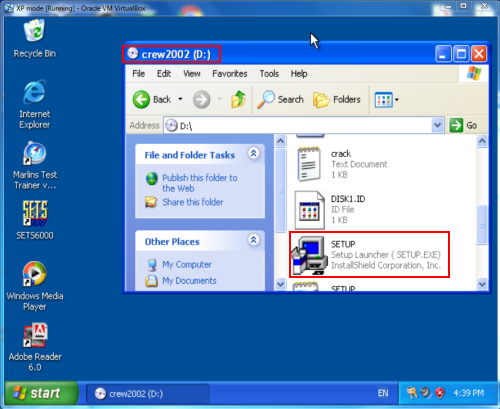
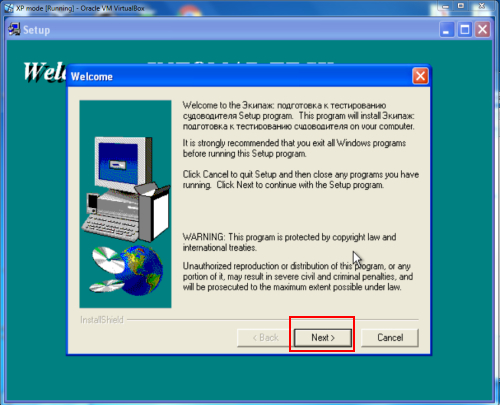
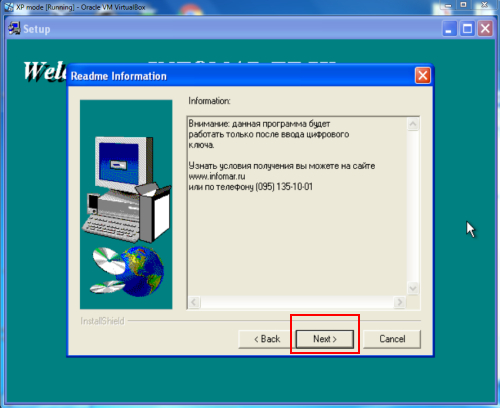
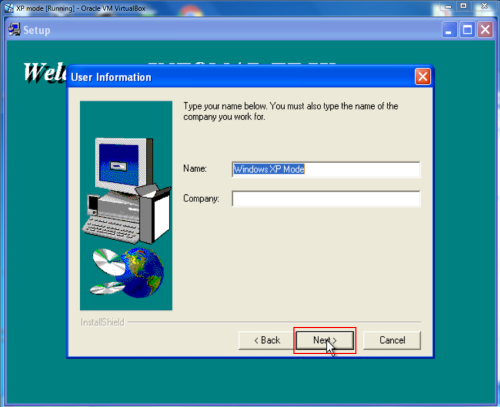
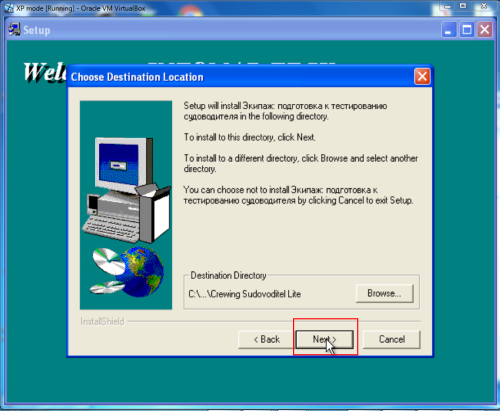
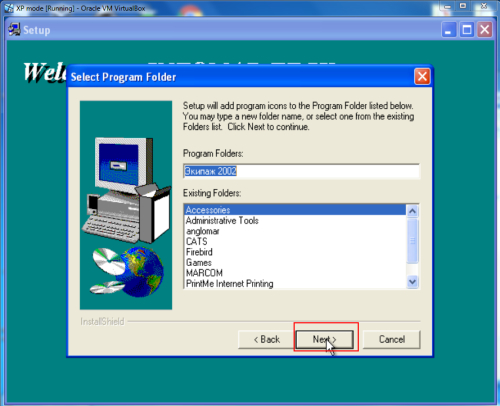
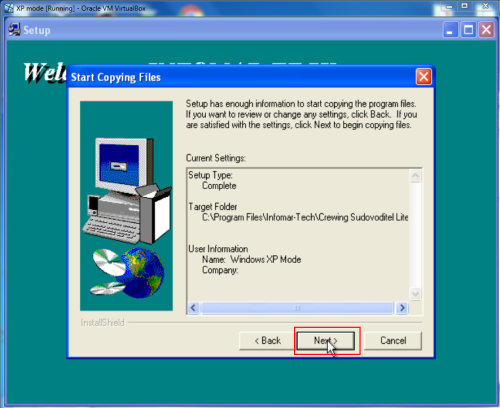
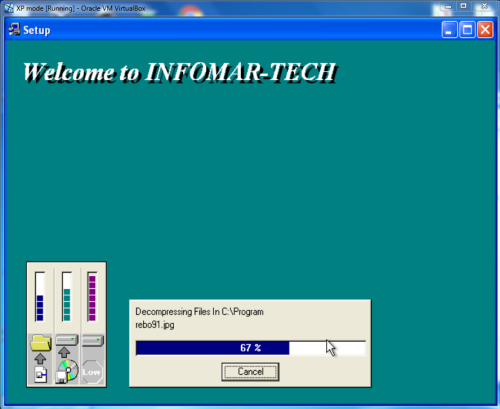
35. Double-click on Setup.exe to start installation. Click on Next buttons.
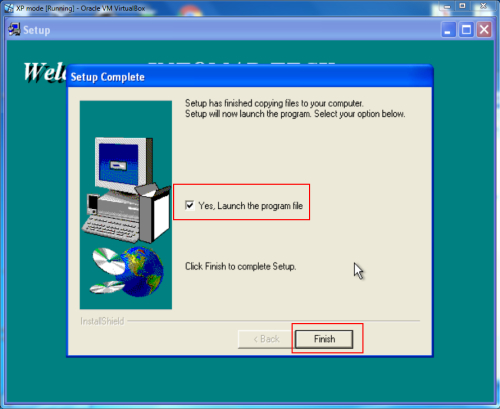
36. Select – Yes, Launch the program file and click on Finish button.
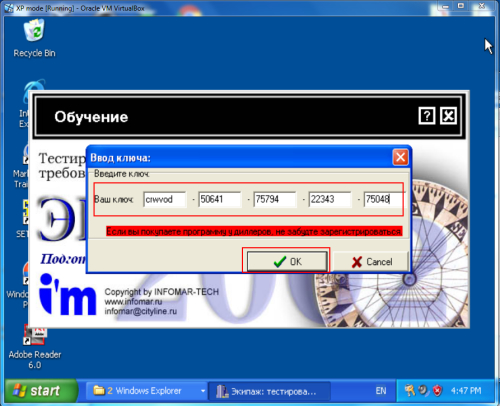
37. You will need to type the Serial number crwvod-50641-75794-22343-75048 . Click on OK button.
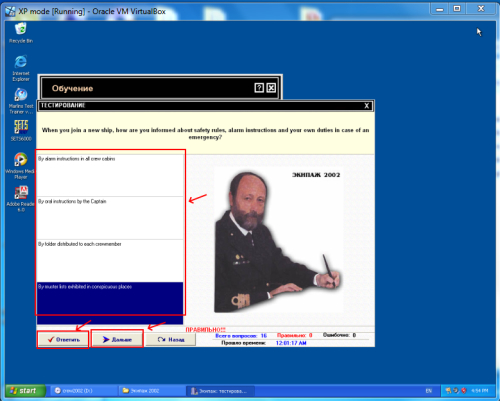
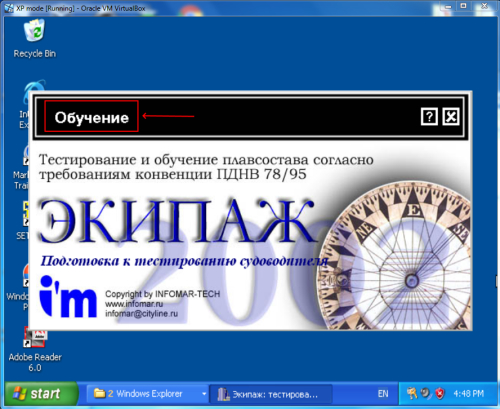
38. Click on Training.
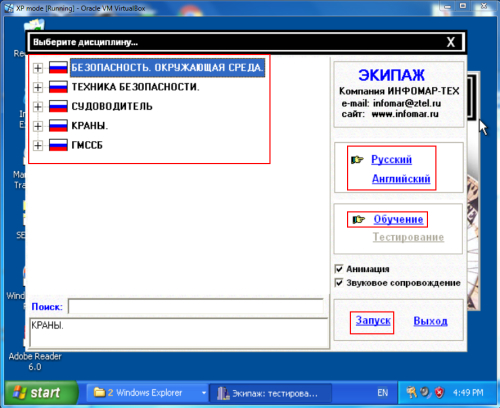
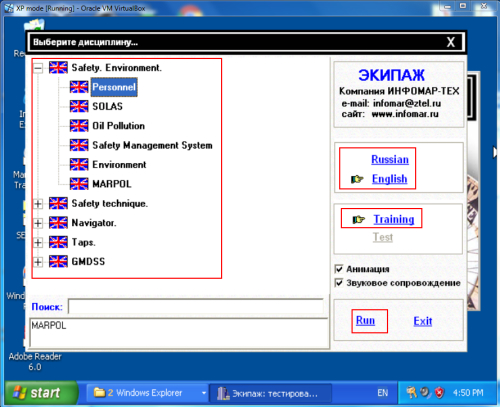
39. Select the subjects and click on Run. Answer all the questions. Recommended by default. You can select English or Russian languages.
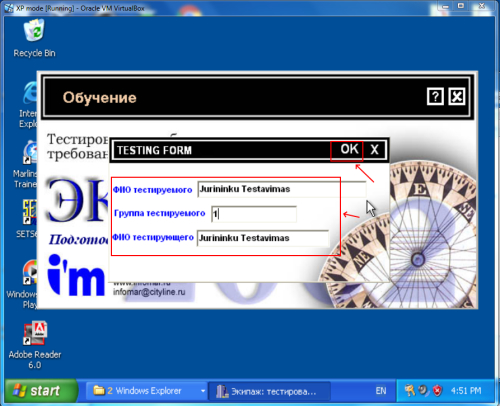
Type the name of student, the student’s group and the name of examiner. Click on OK button.
The test will start. You need to select the correct answer and click on >Next button.